
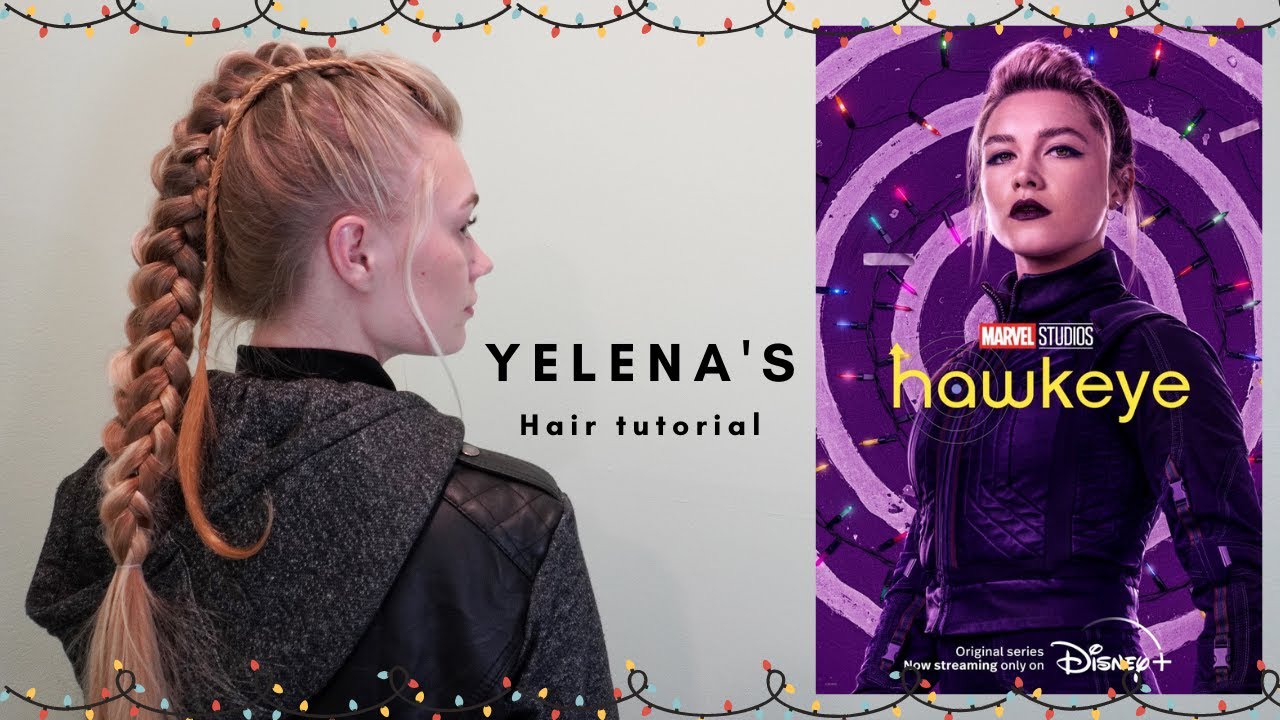
Want to know something that virtually everyone remembers from Marvel Studios’s “Hawkeye?” Yelena Belova’s eye-catching, iconic braids! They have an out-of-this-world vibe, and we’re all living for them.
If you want to know how to get Yelena Belova braids at home, you’re in the right place. This article will provide a detailed, step-by-step how-to guide to recreate Yelena Belova's hairstyle.
Table of Contents
What Do Yelena Belova Braids Look Like?
For anyone who missed them, Yelena Belova braids are commonly described as a round braid and a fishtail braid. However, the Yelena Belova-inspired "round braid" hairstyle can also be described as a straight back 4-strand braid with a small fishtail braid right beside it.
The style also features a small pomp in front to give the style some height and thin tendrils to soften the look up a bit.
How to Do Yelena Braids: Step By Step Tutorial
Now that you know what the Yelena Belova hairstyle looks like and where it originated, let’s get into how the braids are done. Here’s a step-by-step tutorial to get the look in minutes.

Wash, Condition, & Dry Your Hair
If you want your braids to look as good as possible, start by washing your hair. Product buildup and excess oil can make the style look more unkempt than delightfully disheveled.
Wet your hair down in the shower, and then apply your favorite shampoo.
Scrub your scalp with the pads of your fingers to eliminate any dirt or debris there. Rinse your hair thoroughly, and then follow that up with a conditioner of your choice. If you don’t have one already, choose one that provides deep hydration.
After conditioning your hair according to the instructions on the packaging, you’re ready to dry your hair. If you want the braids to look sleek like Yelena’s, you’ll need to blow out your hair for max sleekness - use a heat protectant if you plan on blow drying with heat.
Straighten Your Hair (Optional)
Yelena Belova’s hair is straight. If your hair is curly, you’ll have to straighten it to get it to look like hers. Of course, this step is optional. And don’t forget that straightening your hair can damage it.
If you want to straighten your hair, only do so after blow drying or stretching it almost straight. That way, you won’t have to do a ton of passes on each section of hair and risk ruining your hair.
And always use a heat protectant before you get started, and ensure that each of your strands is covered in the product.
Note: You don’t have to get your hair bone straight for this look. Just get it reasonably smooth, and you’re ready to move on to the next step.
Create a Poof
Grab a two-inch wide section of hair at the front of your head. Twist the section, lay it flat on your scalp, and then push it forward. If you did it right, you should have a small center poof there.
Use bobby pins to secure everything - you’ll place the bobby pins right behind the poof. If you want the poof to be bigger, redo it. To make the poof bigger, you’ll begin twisting the section a little closer to the ends than you did last time.
Let the poof be and move on to the next step.
Do the Fishtail Braid
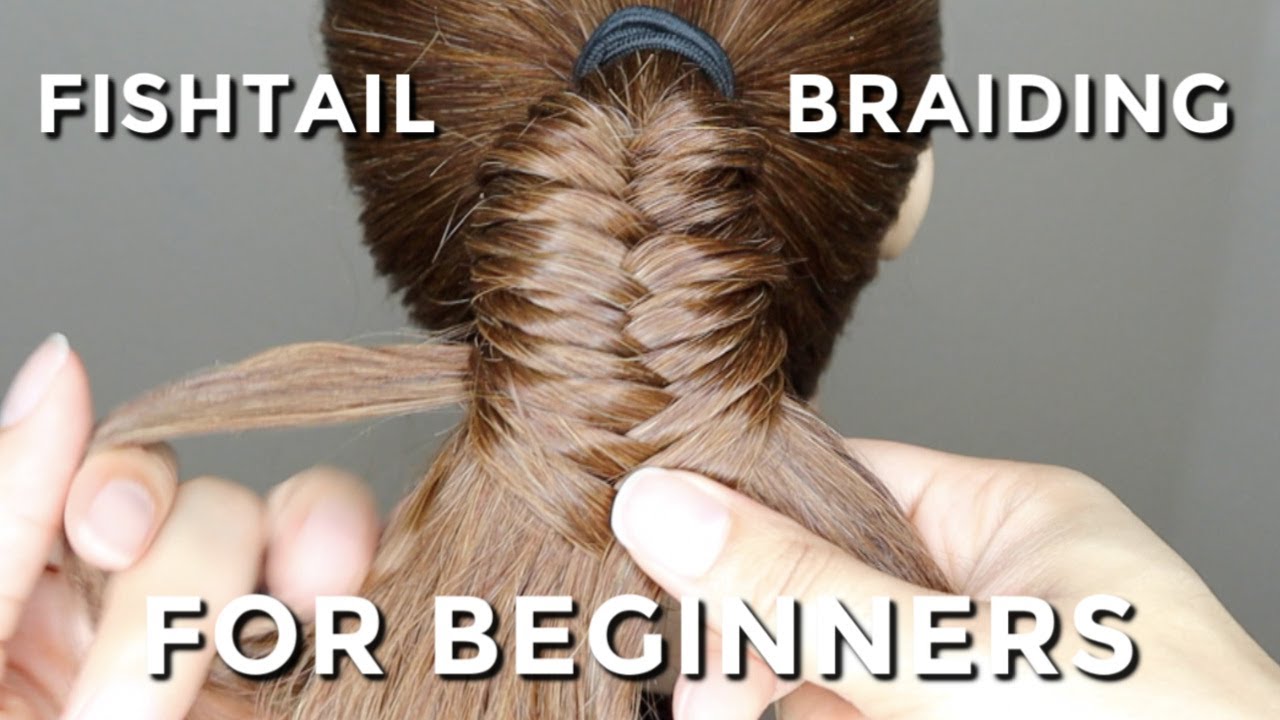
Take some hair on the right side of the poof and do a fishtail braid from roots to ends. Here’s how to do a fishtail braid:
- Divide the section in two.
- Hold each of the sections in your pinky and ring finger on each respective hand.
- Use your thumb and pointer fingers to take some hair from the outside of each of the two sections one after another. You’ll alternate until you reach the ends of the hair. Ensure that the hair is pulled taut as you braid, or your braid may come out bumpy and frizzy.
- Secure the ends of the braid with a ponytail holder or rubber band. That way, it won’t unravel as you complete the rest of the style.
Are you more of a visual learner? Watch this video to see a fishtail braid demonstration.
Do the 4-Strand Braid (Easy Method)
The main attraction of this hairstyle is the 4-strand braid - also called the round braid. You’ll find that this braid is a little more complicated to do than the fishtail braid, but it’s totally doable with the method below.
Here are the instructions to follow for this braid:
- Use a boar bristle brush to direct your hair on the sides and at the crown backward. This hair will end up in your 4-strand braid.
- With your fingers, separate your hair at the crown into 2 sections (from right behind your poof to the nape of your neck). The hair directly behind your poof will be split in half and added to the hair you just split. You should now have two large sections of hair to braid.
- Start with one of those sections (clip the other one out of the way) and do a regular three-strand French braid. To do this, you’ll separate the section into 3 strands and begin braiding as normal, but before you pick up a new piece to braid, you’ll add more of your hair into the braid from the sides. Every few times you pick up hair, you’ll loosen up the inner half of the braid by pulling on it. If you’re working on the left braid, loosen the right side. If you’re working on the right braid, loosen the left side.
- Continue braiding (and loosening the braid) until you reach the ends, and then secure the braid with an elastic.
- Repeat this process on the right side. You should have two cornrows going down the middle of your head.
- Pin the two cornrows together from behind the poof to the end of the braid.
- Pin the fishtail braid to the side of the round braid.
Watch this YouTube video to see how a creator brought the Yelena Belova braids to life.
Pull Out Some Side Tendrils
To complete the look, pull out a small section of hair on each side of your head. And that's it; you're all done!
How Long Does the Yelena Belova Braid Last?
After doing all the work above, we’re sure you want to do everything you can to make it last. Luckily, this style can last up to a week or so. To ensure that it lasts as long as possible, you can spray your hair with some holding spray immediately after finishing the style. You can also wrap your hair in a silk scarf at night to minimize frizz.
Is the Yelena Belova Style for Everyone?
No matter your hair type, the Yelena Belova hairstyle is for you. If you like the style, you can give it a try. Those with curly hair can straighten their hair or leave it in its natural state for a more textured take on the style. Though, straight hair does work best for this look.

Dos and Don’ts of the Yelena Belova Style
The Yelena Belova style isn’t the least complicated style of them all. So, chances are you may mess up along the way. Here are some dos and don’ts that’ll keep you on the right track.
Dos
- Do practice doing cornrows and fishtail braids before trying this style. The overall look will only be as good as your braiding skills.
- Do realize that texture and slight messiness are okay for this style. You’ll have small wispy sections in the front, the texturized poof, and the texture of the braid.
- Do take your time as you braid. Rushing through the style can result in braids that look more unkempt than anything else.
Don’ts
- Don’t use too much tension with any of the braids. Not only would that hurt your scalp/damage your hair, but it will also make the style sleeker than it should be.
- Don’t be afraid to add extensions to make the style more glam.
- Crown Braid Hairstyles for Black Hair
- French Braids With Curls
- Easy Cute White Girl Hairstyles
- Addison Rae Hair
So, there you have it - everything you need to know about how to create Yelena Belova’s gorgeous braids! We hope that the instructions we gave were easy to follow and that we answered all your questions about the style. Good luck!


