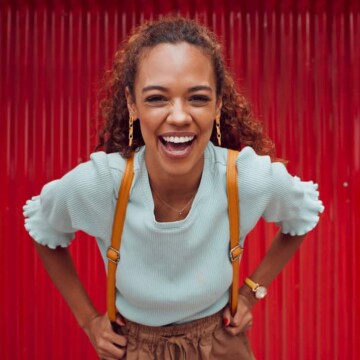
Wavy hair is a gorgeous texture that can lean more to the straight side or the curly side. Whether your waves are almost curly or barely-there, this is the article you need to read. In it, we'll share several ways to make your wavy hair curly naturally and with heat. Let's get right into it!
Table of Contents
How to Make Wavy Hair Curly With and Without Heat
To make wavy hair curly, it is essential to increase the moisture in your hair routine by conditioning after every wash, deep conditioning regularly, and using a leave-in conditioner daily.
Applying a curl definer to damp hair can also help bring out the curls. Techniques such as scrunching, using a Denman Brush, finger coiling, doing a roller or rod set, and heatless pin curls can also make your waves curly.
If all else fails, heat methods such as using a curling iron, curling wand, or flat iron may be used, with proper hair preparation to avoid damage. Keep reading for more detail about each one of these methods.
Up the Moisture in Your Hair Routine
If you have waves that are almost curly, often the only thing you need to do to cross over into curly territory is to increase your hair's moisture levels. When the hair is adequately moisturized, it'll take on a curlier texture than it would if it were dry.
Here are some ways to up the moisture in your hair routine.
Note: These hydration remedies will only work if your natural hair is curly but doesn't look curly due to damage or a flawed hair care regimen.

Condition After Every Wash
Whenever you wash your hair, it loses moisture. This is the case even when you use ultra-hydrating shampoos. It's the act of washing away dirt and debris from your strands that dries them out.
So, after every shampooing session, it's imperative to condition your hair.
Doing so will replenish any moisture you lose during your wash. Not every conditioner will increase your moisture levels enough to make a difference in how your hair looks.
Choose conditioners that have the word "moisturizing" or "hydrating" on the label. These conditioners are more likely to be hydrating to your hair than other conditioner types.
To condition your hair properly, focus the product on the ends of your hair rather than the roots. The ends are the most likely to be damaged and lacking in the curly department. The moisture from the conditioner could be all you need to make your hair curl up how you'd like.

Deep Condition Regularly
Deep conditioning is like conditioning on steroids. Deep conditioners have a lot of the same types of ingredients that conditioners have (emollients, fruit and plant extracts, etc.), but often at a higher concentration.
To give your hair a mega moisture boost, switch out your conditioner for a deep conditioner every now and again. Some find that a weekly deep conditioning treatment is enough to get their hair to curl up a little more, while others only need to use it once every two weeks or more.
Whenever you use a deep conditioner, always keep the usage instructions in mind. Look at the label to find out exactly how you're supposed to use it. Focus the product on the ends of your hair.
And if you want to maximize product penetration, you can put on a plastic cap and sit under a hooded dryer for about a half hour after applying it. You should see your waves get curlier after the first use.

Use a Leave-in Conditioner Daily
Leave-in conditioner is an integral part of most people's hair regimen. This product type contains hydrators and protectants that help your hair thrive. To boost your hair's hydration levels quickly, choose a leave-in conditioner with water as its first ingredient.
It'll be more hydrating than cream-based leave-ins, which tend to be more protective than hydrating. To use a leave-in conditioner, you'll simply spritz it into your waves in sections.
You should make sure that all of your hair is coated in the leave-in conditioner.
You can then comb or run your fingers through your hair to ensure even distribution. Using one, two, or all of the previously mentioned hair hydration remedies can turn your waves into curls in no time.

Use a Curl Definer
Aside from the hydration remedies mentioned above, you can coax out your curls with a curl definer. A curl definer is a cream that you'll apply to your damp hair to make your curls more visible and hold them in place.
Some curl definers work better than others, so we recommend experimenting with several until you find one that you really like.
To use a curl definer on wavy hair, you'll first hop in the shower and wash and condition your hair. Once you hop out, apply your favorite leave-in conditioner and then separate your hair into 2 to 4 sections.
Rake the curl-defining cream into each section of hair, being careful not to miss any spots. Then style your hair as you normally would. The formula should leave your hair curlier than it started.

Scrunch, Scrunch, and Scrunch Some More!
Bringing out your curls has a lot to do with what you apply to them topically. But it also depends largely on how you handle them after applying your given product. Scrunching is a great way to get your waves to look more like curls.
Just make sure that your scrunching technique is right. Here's how to do it:
- Apply your given product to your waves – preferably a curl definer or gel.
- Lean over to the side and cup a handful of waves into your hand.
- Squeeze and push the hair upward towards your scalp at the same time. Do it several times.
- Move to another section of hair, leaning in whatever direction gets your waves to hang toward the floor.
- Rewet any sections that start to dry during the process and continue scrunching until you've done it to all of your hair.

Use a Denman Brush to Bring out Your Curls
The Denman Brush is often used for those with obviously curly/coily hair. But if you know how to work with the tool, you can use it as a heatless hair curler.
First, you have to coat your damp hair with a moisturizer or curl definer. Then, you'll carve out a one-inch section of hair and brush through it with the Denman brush.
Once the section is free of tangles, you'll wrap the hair around the handle of the brush. To do this, you'll put the roots of your hair at the base of the brush and then twist the brush continuously as your hair begins to coil down the handle of the brush.
With all of your hair wrapped around the brush, you'll uncoil the hair from the brush handle, starting at the roots. Leave the resulting coil alone. Repeat the process on the rest of your hair in sections. Scrunch all of your hair upward a few times, and then let it air dry.
We realize that it might be difficult to get the hair-wrapping technique down, so here's a video demonstration to help you out!
Finger Coil
Finger coiling is another way to define your waves to get them to look curlier. It involves sectioning off your damp waves, detangling them, and then coiling them around your fingers in sections.
After all of your hair is coiled, you can wait for it to air dry, or you can gently diffuse your curls to speed up the process. When your hair is 100% dry, go ahead and separate and fluff as needed to achieve the look you want.

Do a Roller or Rod Set
Roller and rod sets can give you curls as tight as you want. All you need are rollers or rods, some hair mousse, a comb, and a couple of hours for wrapping and drying your hair.
Before you get started with the setting process, it's important to ensure that you've got the right size rollers or rods for the look you're going for.
The larger the rods are and the larger your sections are, the looser your curls will be. And the reverse is true for smaller rods wrapped around smaller sections of hair.
Here's how to do a roller or rod set:
- Shampoo and condition or deep condition your hair. Roller and rod sets on dirty hair take forever to dry and can produce overly greasy results.
- Squeeze out any excess water from your hair with your hands.
- Apply your favorite leave-in conditioner.
- Smooth on a curl-defining gel or cream or styling mousse with a flexible hold.
- Part out a small to medium section of hair and wrap it around the rod or roller. The easiest way to roll your hair up is to wrap it from the ends and twist the roller/rod until you get to the roots.
- Secure the rod by folding the end upward or the roller by using the clasp.
- Wait for your hair to dry, sit under a hooded dryer, or blow dry your hair.
- Remove the rollers or rods from your hair one at a time by unclasping or unfolding them and twisting them in the direction opposite of how you did initially.
- Separate your new curls and give them a spritz of finishing spray to keep them from falling prematurely.

Do Heatless Pin Curls
Pin curls don't have to be done with heat, and this method is the proof. They involve coiling sections of hair around a finger and then pinning the curls down until they dry.
When you take the pins out, you'll see that you've got bouncy, voluminous curls.
Just know that the longevity of your pin curls depends on the products you use before coiling and pinning your hair.
Use a product with a lot of hold if you want your curls to last for days. Mousses, gels, and creams can all work, but a little experimentation may be necessary to arrive at the right product combination for this method.
Add Curls with Heat
Everyone knows that you can get curls with heat, and this might be the way to go if the previous methods don't give you the curls you've been dreaming of. For all of these heated methods, it's imperative to prep your hair carefully to avoid damaged hair.
Here's how to do it:
- Wash, condition, and detangle your hair.
- Apply a leave-in conditioner for an extra dose of moisture.
- Spritz on a heat protectant to ward off heat damage. Take your time and part your hair in several sections to gain access to all of your strands. Then, comb the product through to aid in product distribution.
- Blow dry your hair with a blow dryer brush or a blow dryer with a comb attachment. Be very careful not to yank your hair with the tools.

Curling Iron
With your hair sufficiently prepped, you're ready to get some curls. Here's how to use a curling iron to get curls on wavy hair:
- Turn on your curling iron and give it some time to heat up.
- Part out a small to medium-sized section of hair near the nape of your neck.
- Clamp the curling iron down at the roots of your hair and pull it down toward the ends.
- Before you get to the ends of your hair, twist the curling iron repeatedly so that your hair starts to coil upward. Stop twisting when you get relatively close to your scalp.
- Wait 5 to 10 seconds for the heat to do its thing.
- Release the lever on the handle of the curling iron and pull down to release your curl.
It's important to note that the size of your curling iron matters. The smaller its barrel is, the tighter your curls will come out. If you can, choose a curling iron with interchangeable barrels so you can try out multiple curl sizes.
Curling Wand
Some people use curling wands because they find them easier to use than curling irons. Regardless, they achieve a similar goal.
The great thing about curling wand curls is that they get narrower as you get to the ends, which you may find more visually appealing than more uniform curls. To use a curling wand, you'll wrap sections of hair around a heated barrel, wait a few seconds, and release.
Here are some more detailed instructions to follow:
- Do all of the hair prep we mentioned earlier.
- Turn on your curling wand and give it some time to heat up.
- Part out a one-inch section of hair.
- Detangle that section until it's smooth and free of tangles.
- Place the curling wand close to your scalp without burning your scalp.
- Begin wrapping the hair around the barrel of the curling wand.
- As you wrap, move down the curling wand. Stop wrapping when you reach the ends of your hair, being very careful not to burn yourself. Continue holding the ends of the hair, or else the hair will fall off of the wand.
- Wait for about 10 seconds for the heat to do its magic.
- Release the curl and hold it in your hand without letting it drop.
- When the curl is cool, let it hang and move on to the next section of hair.
- Repeat the process on the rest of your hair.
- Finish things off with a flexible hold hairspray.

Flat Iron
You don't need a curling tool to make curls on your wavy hair. You can also use a flat iron. It'll give you curls that look a little bit more natural than those done with a curling iron.
To get flat iron curls, here's what you need to do:
- Prep your hair according to the instructions above.
- Turn on your flat iron and give it some time to heat up.
- Separate your hair into 2 to 4 sections, securing all of them with elastics or clips.
- Release one of the sections and part out a subsection.
- (Optional) Clamp the flat iron down on the roots and pull it down past the ends to straighten the hair. Repeat this on all of your hair to get super sleek curls.
- Resection your hair in 2 to 4 sections and curl your hair with the flat iron. To do this, you'll clamp the tool down at the roots of a section of hair like you would if you were straightening it. But as you move the flat iron down the section, you'll twist your wrist a bit to either side. If you want a tighter curl, you can twist your wrist as far as it will go as you pull the flat iron through your hair.
- Repeat the previous section on all of your hair.
- Spritz your hair down with a finishing spray for shine and hold.
You might see people using 1-inch flat irons for curling, and if you want subtle curls, you can use one of that size. But if you want tight, natural-looking curls, go for a smaller size iron, like half an inch or even smaller.
So, there you have it – how to make wavy hair curly. Some of these methods will work like a charm for some and not for others. We urge you to try several of the methods, starting with the heatless ones, to see which ones work best for you.
Over time, you'll find your holy-grail method, and styling your hair into curls will become second nature. We hope that you found all the information you were looking for, and we wish you the best in your styling endeavors.

