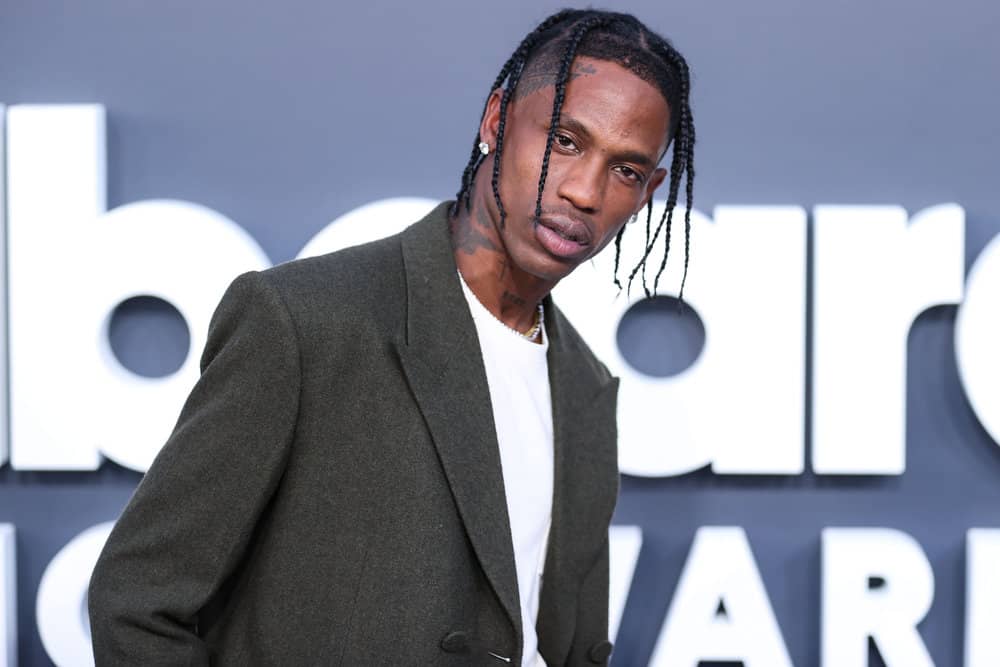
Mega-popular rapper, Travis Scott, has garnered an impressive list of accolades and an astronomical number of fans. His unique sound, clever lyrics, and mind-bending production skills all draw fans into his world.
But one thing about him that fans can't get enough of is his aesthetic, and a big part of that is his hair.
Travis Scott braids have made their way around social media many times and have become somewhat of an official style people ask for by name. If you want to know how to get the look, this is the article for you! We'll cover everything you need to know about it.
Table of Contents
- 1 What Is Travis Scott Hair?
- 2 How to Get Travis Scott Braids
- 3 Instructions for Knotless Box Braids
- 4 Instructions for Box Braids Without Extensions
- 5 Travis Scott Also Has a Fade
- 6 How Much Do Travis Scott Braids Cost?
- 7 How Long Do Travis Scott Braids Last?
- 8 Tips for Getting Travis Scott Braids Done Professionally
What Is Travis Scott Hair?
If you do a little research, you'll see that many call Travis Scott braids knotless braids. These are braids done with extension hair added. What makes these braids special is that there's no identifiable knot at the base of each braid.
If Travis Scott does indeed use extensions in his hair, this hairstyle name would be correct. If he gets his natural hair braided without extensions, this style can be called box braids.
They're three-strand plaits done on box-sized sections of hair.
Regardless of the labeling, the truth is that either style will give you a similar look. Though, knotless box braids may result in slightly thicker braids, given that extension hair is added.

How to Get Travis Scott Braids
The method you'll choose to get your Travis Scott braids will depend on the length and thickness of your hair and your desired results.
Here are a few tips to help you decide whether you need to do knotless box braids or box braids (without extensions):
- If your natural hair is shorter than chin length - knotless box braids.
- If your natural hair is very thin - knotless box braids.
- If you don't want to add extensions to your hair - regular box braids without extensions.
- If you are short on money or aren't confident in your ability to work with extensions - regular box braids without extensions.
These tips are only meant as a guideline. Ultimately, you should use your judgment to determine which route you'll take to get Travis Scott braids.

Instructions for Knotless Box Braids
For anyone who's chosen knotless box braids, you should first know that they'll take a lot of practice and video demonstrations. But here is how the process goes in a nutshell:
- You'll wash, condition, detangle, moisturize, and blow dry your hair as straight as you can get it. The kinkier your hair is, the more it may stick out of the finished braids. You could use gel to keep the braids neat, but blowing the hair out first will make it easier.
- Part your hair in half from your hairline to the nape of your neck with a rat-tail comb. Wrap an elastic around each of the sections.
- Release one of the large sections from the elastic and part out a smaller, box-shaped section. This will be your first braid.
- To do the knotless box braid, you'll divide the section into three equal sections and begin three-strand plaiting the section. After plaiting for a few seconds (or crossed over three times), you'll feed in some braiding hair.
- Continue braiding, but every few seconds, you'll add more braiding hair. Stop adding hair when the braid is as thick as you want it.
- Finish braiding the hair down to the ends. Ce sure to braid past your natural hair.
- Cut off the excess braiding hair with hair-cutting shears.
- Wrap a rubber band around the ends of the braid.
- Repeat the braiding process for all the other braids on that half of your head and then for the other half.
- Cut away any hairs that are sticking out, and you're all done.

Instructions for Box Braids Without Extensions
For box braids without extensions, the process will look a little different. Here's what you'll do.
- Prepare your hair for the braiding process by washing, conditioning, detangling, and towel-drying your hair.
- Divide your damp hair in half, and then further divide it into 8 to 10 sections total. Loosely wrap a rubber band or elastic around each section to keep it from unraveling.
- Choose a section and remove the elastic/rubber band from it.
- Apply some gel or pomade to the hair, focusing mainly on the roots, but don't neglect the mid-lengths or ends. You want the entire braid to be frizz-free and sleek.
- Run a comb through the hair to remove any knots.
- Separate the section into three smaller sections and three-strand plait them down to the ends.
- Secure the ends of the braid with a small rubber band the same color as your hair.
- Move to the next section and repeat the previous steps.

Travis Scott Also Has a Fade
In case you didn't know, there's more to the style than just the braids. In addition to the braids, Travis Scott rocks a high drop fade. As you would expect from such a fade, the fading effect starts right around the temples.
It also extends along the sides of the head and the nape of the neck.
For those who are serious about replicating this style, don't skimp on the high drop fade. Your local barber can get it done for you in no time. You can, of course, do the fade yourself if you can get your hands on the right clippers.
How Much Do Travis Scott Braids Cost?
Regardless of the style's popularity, Travis Scott braids are incredibly affordable. Depending on where you live and the length of your hair, you may be able to get them professionally done for less than $50.
The longer your hair is, though, the more you'll likely have to pay.
If you're low on funds, we recommend you try creating this look on your own. All you'll have to pay for is the materials, which will cost less than what you'd pay for a professional installation in most cases.

How Long Do Travis Scott Braids Last?
Travis Scott braids may last anywhere from a few days to a week. If you got yours with extensions, you might be able to squeeze a few extra days out of the style. But if you opted for no extensions, a week is about the max.
Once the braids get frizzy and no longer look the part, you'll take them down and redo them if you'd like. And if you opt for a high drop fade, it'll grow out after a couple of weeks, so you'll have to take care of that too if you want the style to look its best.
Tips for Getting Travis Scott Braids Done Professionally
Not everyone has the time or skill set to do their own Travis Scott braids; it's understandable. If you fit in this camp, you'll need to see a professional to get the look. Keep these things in mind before you do so, though.
Choose a stylist that can both braid and cut hair. They'll need to be able to do the braids as well as your high drop fade.
Pay attention to how tightly they braid your hair. You will feel some tension while the stylist braids your hair, but it shouldn't be overly painful, and you shouldn't need to take Tylenol or Advil afterward.
Wearing your hair in styles that are too tight can pull your hair right out of your scalp and even cause permanent balding.
Call ahead of time to find out whether they want you to wash your hair before you come. You should also ask if you need to bring your own extension hair (if you've opted for knotless box braids).
Always bring multiple pictures for reference. In this case, you'll bring several pictures of Travis Scott's hair from as many angles as you can find. That'll make it easier for your stylist to give you the desired style.
So, there you have it–everything you need to know about Travis Scott braids. We hope you found all the information you were looking for, and we wish you the best with your hairstyle transformation!


