
Bleaching is known to be one of the most dangerous chemical treatments you can put your hair through. Yet, millions of people a year use bleach to bring their hair transformations to fruition.
In many cases, people opt to see a professional for their hair bleaching treatments, but there are times when going the DIY route is a much better option.
If you want to learn how to bleach your hair yourself, this is the article for you. In it, we'll give you step-by-step instructions on how to bleach hair and teach you how to prevent fails and long-term hair damage. Let's get right into it!
Table of Contents
Before Bleaching Your Hair
Chances are you're anxious to get to the DIY bleaching instructions, but before we go there, it's important to touch on what you should do before bleaching your hair. The first thing is to do an honest assessment of your hair's health.
Does it have a ton of split ends or breakage? Has it been coming out in clumps? Does it feel rougher to the touch than usual? Has it seen better days?
If the answer to any of the previous questions is "yes," you should hold off on the bleach and prioritize your hair's health. One thing that you should know about bleach is that it's super harsh and will make most existing hair problems worse.
In case you haven't seen the many bleach fails on Youtube, applying bleach to already-damaged hair could result in your hair coming out in chunks.
Other times, your natural hair texture could disappear and be replaced by a gummy texture due to loss of protein. And these are not the only issues you may encounter when bleaching over damaged hair.
If your hair is healthy, proceed to the next section!

How to Bleach Hair: Step By Step Instructions
The previous section wasn't meant to scare you away. Your bleaching session will go beautifully if your hair is reasonably healthy and you know what you're doing. And in this section, we'll tell you exactly what to do to get the results you want!
Prep Your Natural Hair
In case you didn't know, your natural hair should be prepped weeks before bleach day. Though it can feel like a drag, prepping your hair will pay dividends.
Your hair will handle the chemicals better, so there won't be as many split ends, and your risk of damage will decrease. The healthier your hair is at the time of bleaching, the better.
Here are some tips to follow before your bleaching session:
- Put the heat tools down at least a week prior to bleach day. Doing so will give your hair some time to recover before the chemical treatment.
- Up your deep conditioner treatments for at least a couple of weeks before bleaching. The nutrients in the average deep conditioner will help to strengthen and hydrate your hair so it can better handle the chemicals. You can use a store-bought deep conditioner or mix one up yourself. Banana, egg, and yogurt masks are super popular in the DIY hair care world.
- Don't do any chemical treatments on your hair for at least 2-3 months before bleach day. People have done chemical treatments back to back with horrific consequences.
- Hold off on shampooing for 48 hours prior to bleaching. Your hair shouldn't be squeaky clean on bleach day because of the risk of scalp irritation. If you try bleaching recently washed hair, your scalp will not have had enough time to build up its protective oils. So, when you apply the bleach, your scalp will protest with burning. You can avoid the bulk of bleach-related irritation by not shampooing your hair for 48 hours prior to bleaching.
- Don't bleach your hair when it's caked in buildup. Though bleach is strong enough to get through mildly dirty hair, it may not be able to penetrate super thick, caked-on buildup. So, you should definitely give your hair a good wash if you have product, oil, or other buildup on it. But you shouldn't use just any kind of shampoo - you'll need a clarifying shampoo for buildup. It's got a high concentration of surfactants that can lift away just about anything that might be hanging out on your hair. But be sure to wait 48 hours after cleansing to bleach your hair.
- Coat your hair in coconut oil to protect your strands from breakage and damage. The jury's out regarding whether coconut oil actually protects your hair from the harshness of bleach, but many suggest that it does. So, if you want to give it a try, you certainly can. We just advise you not to ignore the other hair prep steps given in this section, given the fact that the oil may not make a difference.
Prepping your hair in this manner will ensure that your hair is in its best possible condition and that your scalp is adequately protected.

Gather Your Supplies
With your hair sufficiently prepped, you're ready to proceed to the next step, which is gathering all the supplies you'll need for the bleaching process. To ensure that your bleach job goes off without a hitch, pick the following items up beforehand:
- Bleaching powder - You can use most bleach powders, but some of the most popular are Quick Blue and Clairol Professional BW2.
- 20-vol Developer (cream or liquid) - Cream developers are often easier for beginners to work with because they make the resulting bleach mixture less likely to run. You'll also end up with less mess.
- Tinting brush
- Gloves
- Mixing bowl
- Newspapers or towels
- Comb
- Shampoo

Prepare Your Space
Bleach is known to stain nearly everything, and it can irritate your skin. So you'll want to take steps to prevent that. Put on a shirt that you don't care much about and put an old towel around your neck to catch any bleach drips. It also helps to put newspaper or towels down on the floor and on your counters to protect against staining.
Bleach Your Hair
You've got all you need to start the bleaching process. So, let's jump right into it! Here's how to bleach your hair safely at home:
- Separate your hair into four equal sections with a comb or your hands. Combs provide the most precision. If your hair is super thick, make more sections - 6 is about right for those with super thick hair.
- Mix up your bleach. For the best results, you'll follow the mixing instructions on your bleach. You'll usually be instructed to mix the bleach and developer in a 1:2 ratio. Mix them in your mixing bowl using the tinting brush. You're all done mixing when everything is smooth and any lumps are gone.
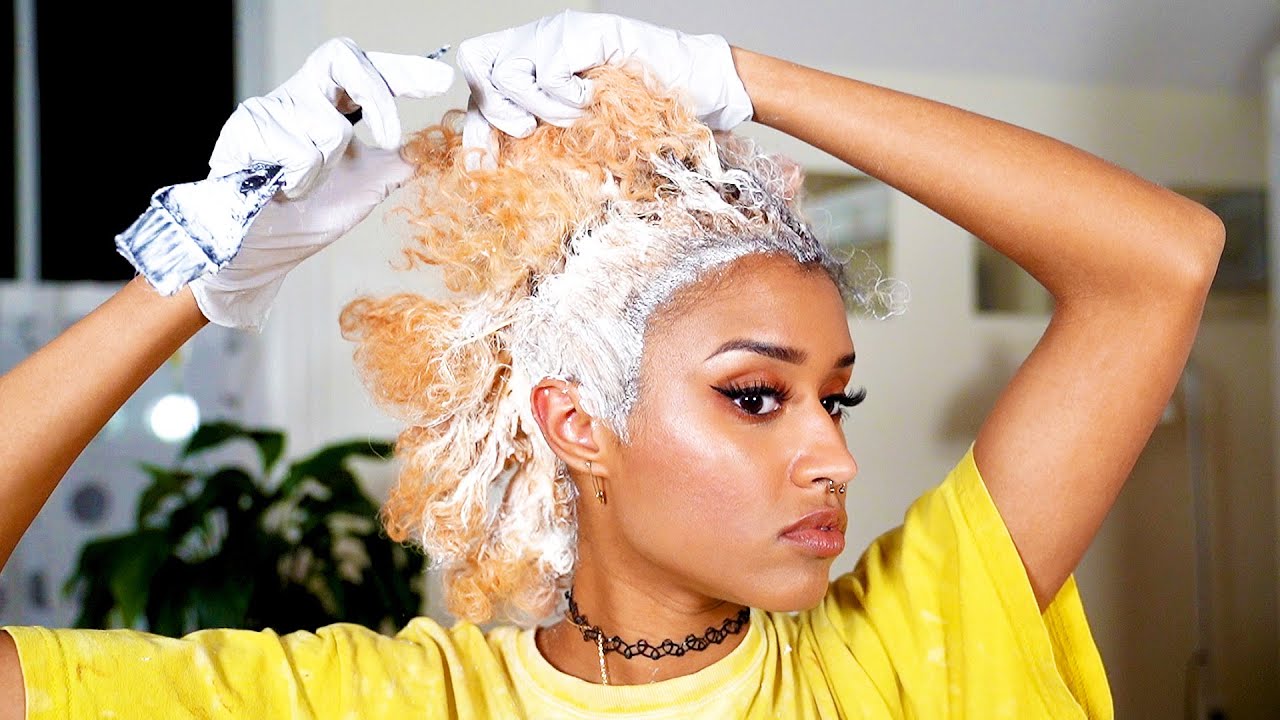
- Begin applying the bleach to your hair. Here's the fun part - applying the bleach. You'll start by applying the bleach to your hair in thin sections, stopping an inch from your scalp. The hair at the roots will process faster than the rest of the hair, so you won't apply the bleach there until later. After you've applied the bleach to your mid-lengths and ends, go back and apply it to your roots.
- Start a timer and let the bleach process. Depending on the look you're going for, you may need to let the bleach sit for anywhere from 30 to 45 minutes. Set a timer according to the instructions on the bleach's packaging. But don't forget about your hair while it's processing; leaving the bleach on for a minute or two longer than you should could result in some serious damage. To prevent that from happening, check your hair now and again while it's processing. All you'd need to do is wipe the bleach mixture off of a small section of your hair and take a close look. If your hair has lightened to a level you're happy with, then go to the next step. If not, apply more bleach to that section and allow the bleach to continue to process. Don't leave the bleach on for longer than 45 minutes.
- Rinse your hair thoroughly. Once you're satisfied with the level of lift you've achieved, it's time to rinse the bleach out of your hair. Use lukewarm water and massage your hair and scalp as you rinse. It could take several minutes to get all of the bleach out.
- Shampoo your hair. Shampoo your hair to remove any bleach remnants from your hair or scalp. It's imperative not to skip this step because there will be instances where bleach is left behind, and you're unable to see it.
And that's it! You're all done and ready to move on with the rest of your hair care and styling process.

Dos and Don'ts of Bleaching Your Hair at Home
We covered the basics of bleaching your hair at home in the previous section. Unfortunately, for some, the basics won't be enough to ensure a good result.
That's why we like to give additional information via dos and dont's to help you avoid common bleaching mishaps. Here are the dos and don'ts of bleaching your hair at home:
Do
- Do a strand test before applying bleach to your entire head. This test will require you to mix up a small batch of bleach mixture and apply it to a small sliver of hair to see how your hair will react. It'll also reveal to you how long it'll take to arrive at your desired level of lightness. Use a timer during your strand test and note how long you need to allow the bleach to process for your ideal lightening result. After that, you'll rinse the bleach out, shampoo, and then move on.
- Do get the bleach on quickly and thoroughly. We've seen many YouTube bleaching fails. One of the most common mistakes people make is taking too long to get the bleach on their hair. The second you apply the bleach to a section of hair, the lightening process will start. If it takes 30 minutes for you to finish applying the product to the back of your head, by the time you get to the front, it'll be time to rinse the bleach off of the back sections. Use your tinting brush, a three-panel mirror, and maybe a helper to get the bleach on quickly and evenly.
- Do be patient when going super light. It could take 2, 3, or more sessions to get your hair to a platinum or light blonde, especially if your hair was dark to begin with. If you need to do multiple lightening sessions, be sure to wait a few days to a week between sessions to give your hair some time to recover.

Don't
- Don't wing it. Bleach and developer come with usage instructions for a reason. These are chemicals that react well together only under precise conditions. So, if you misuse them, you and your hair could pay the price. If you're new to bleaching your hair, read the instructions on the bleach and try to follow them to a T.
- Don't apply heat to your hair while the bleach is on it. Extreme heat and bleach is the perfect recipe for hair loss and scalp irritation. Allow the bleach to process either in the open air or in foils to avoid increasing your risk of adverse hair situations. And, honestly, it's best to leave foiling to the professionals if you're not used to bleaching your own hair.
What Should You Do After Bleaching Your Hair?
If you're a hair-bleaching novice, there's just a whole lot that you may not know. For instance, what to do after bleaching hair. In most cases, you'll want to do a deep conditioning treatment.
Even if you prepared your hair for the process and don't see any immediate damage your to hair following the bleaching process, give your hair a pick-me-up after such a harsh chemical treatment.
Keep in mind that not every deep conditioner is the right choice after a bleaching treatment. You should opt for a deep conditioner that contains protein in addition to moisturizers. After bleaching your hair, your strands may be protein-deficient, so adding protein back to your hair is a great step to take.
What's great is that there are tons of protein-based deep conditioners to choose from.
Take a trip to your local beauty supply store, department store, or search online for a protein treatment. Either way, it won't be difficult for you to find one.
To use a protein-based deep conditioner, you'll follow the instructions on the packaging - they are your source of truth. But you'll usually apply it to your damp hair, comb it through so that all of your strands are coated, wait a few minutes, and then rinse it out.

How to Care for Your Bleached Hair
Just because you've lightened your hair safely with bleach doesn't mean that you're out of the woods. If you want your hair to remain where it's supposed to be - on your head - then you have to take meaningful and ongoing steps to care for your bleached hair.
Here are a few things to keep in mind:
Step Away from the Heat Tools
Post-bleaching, your hair is super fragile. So, one of the worse things you can do is add direct heat to the equation with heat tools.
The heat from these tools increases your risk of curl pattern loss, split ends, breakage, brittleness, and more. It's wise to avoid heat tools for at least a week, and then after that week is up, limit your heat usage indefinitely.
Whenever you can't help but heat style your hair, use a high-quality heat protectant to shield your hair from heat damage.

Use Gentle Hair Care and Styling Products
Your shampoo, conditioner, gel, and other hair products might seem harmless. And, for your unbleached hair, they might actually be harmless. But bleached hair is much more temperamental - it can't take much abuse, even from your routine hair products.
So, if you find that your current hair products are now too harsh for your hair, switch those out for gentler alternatives.
Look into sulfate and salt-free shampoos, alcohol-free gel, and other hair products formulated for damaged or color-treated hair. They work just as well as those other products but will be much gentler on your bleached hair.

Do More Deep Conditioning Sessions
If you're someone who doesn't do a lot of deep conditioning sessions on a regular basis, it may be time to step things up in this area. Bleached hair needs a lot of TLC, and you can give it just that with deep conditioning sessions.
For those who normally deep condition their hair every month, try doing so every 2 weeks or even every week. Chances are you'll see a big difference in your hair.
- Stages of Lightening Dark Hair
- How to Bleach Black Hair
- How to Do a Bleach Bath for Hair
- How to Bleach Dreads
So, there you have it - everything you need to know about how to bleach your hair at home. If you have additional questions, reach out to a local stylist or colorist in your area. If you experience any adverse skin reactions to bleach, we strongly encourage you to seek medical attention to get things back to normal.
We hope you found all the information you were looking for in this article, and we wish you the best in all of your hair-bleaching escapades. Happy bleaching!


