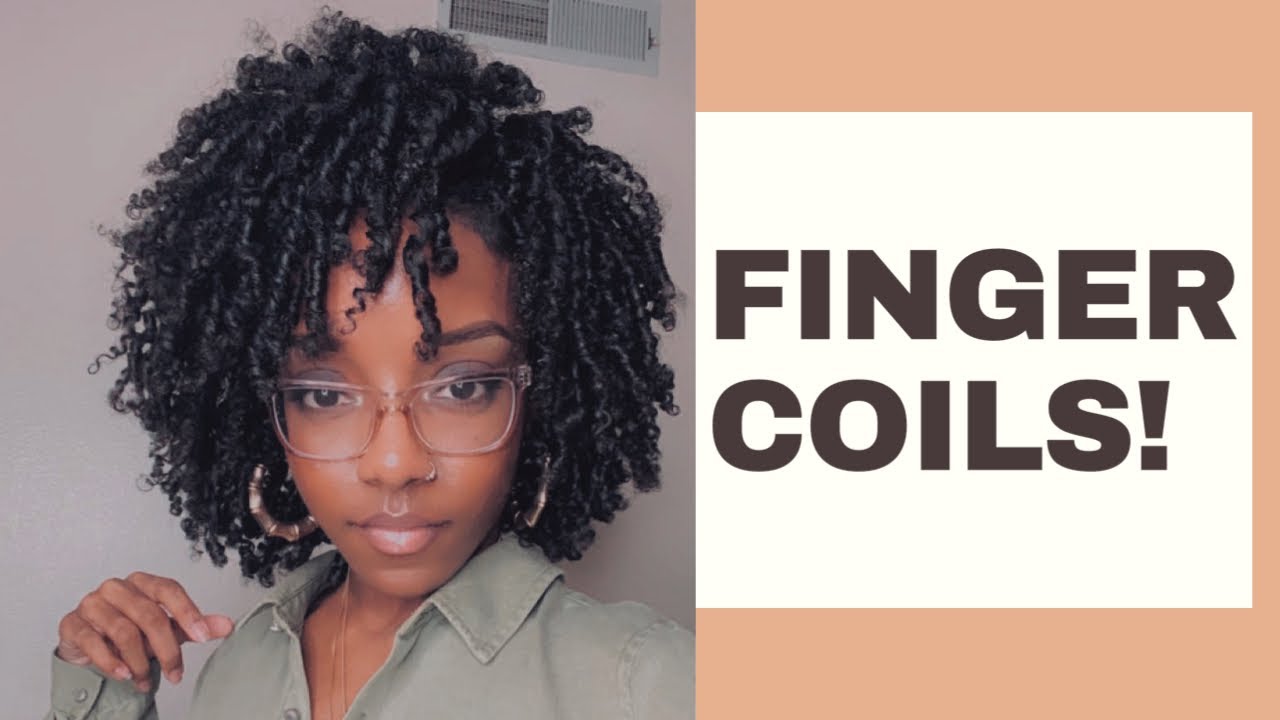
If you're looking for a unique and gorgeous way to style your natural hair, then finger coils (also called finger curls) are the perfect style to try. The style goes well with both casual and formal looks and complements every face shape.
It also works well on short hair and can be jazzed up with a beautiful head wrap.
In this article, we’ll fill you in on how to create finger coils on natural hair. We'll use the traditional finger coil method allowing you to achieve a head full of moisturized, defined finger coils that can last for weeks!
Table of Contents
What Are Finger Coils?
The finger coils hairdo is a curly hairstyle created by twisting your natural hair around your fingers to create coils (i.e., finger curls). The hairstyle usually lasts for at least a week and works well on several natural hair types and textures.
How To Create Finger Coils on Natural Hair

Before you begin styling or even prepping your natural hair for finger coils, it's essential to make sure that you've gathered all the necessary supplies and hair products.
Not only will this make the finger coiling process easier, but it’ll ensure that the styling process goes off without a hitch. Below are all of the supplies you’ll need for your finger coils.
Prep Supplies:
- Pre-poo hair treatment of your choice (optional)
- Clarifying and moisturizing shampoo, or co-wash (read this article to learn more about the co-washing technique)
- Moisturizing conditioner
- Moisturizing products of your choice, such as leave-in conditioner, oils, or curl creams.
- Shower cap
Styling Supplies:
- Spray bottle with water
- Alligator clips
- Gel
- Rat-tail comb
- Wide-tooth comb
- Edge control
- Shine spray (optional)
Maintaining/Refreshing Supplies
- Hair oil
- Silk scarf or bonnet to wear when sleeping
- Spray bottle with water
Prepare Your Hair for Finger Coils

Once you’ve got all of your supplies, you’re ready to begin the preparation process. Some may be tempted to skip hair prep and go right into styling, but this is not recommended.
If you try to do finger coils without prepping your natural hair beforehand, you may end up with frizzy finger coils that won’t last. So, we recommend that you follow the below hair preparation steps before you begin styling.
Cleanse Your Hair
Whether you’re doing finger coils or any other protective style, you should cleanse your hair thoroughly. There are two common ways to cleanse curly natural hair, including washing with shampoo or co-washing, which means cleansing with conditioner.
Pre-Poo Treatment (Optional)
If you are going to wash your hair with shampoo, it may be a good idea to apply a pre-poo treatment to your hair beforehand. You will probably not need to use a pre-poo treatment before co-washing, as your hair will not be stripped of its moisture by co-washing.
Pre-poos are beneficial because they ensure that your hair is thoroughly moisturized before applying shampoo, which can strip your hair of a lot of its moisture.
The pre-poo step is especially useful if your hair is dry or damaged, as it can help to prevent damage to your hair by the shampoo.
Pre-poo treatments usually consist of oils, conditioners, or both. You can use one of many pre-poo products out there, like The Mane Choice Heavenly Halo Deep Hydration Pre-Poo or Mielle Organics Pre-Shampoo Treatment.
But if a home remedy is more your style, you can take your pick of several options, like olive oil or a mixture of coconut oil and honey. Here's how to apply a pre-poo treatment:
- Thoroughly dampen your hair using a spray bottle of water.
- Divide your hair into several sections.
- Starting with your first section, apply the pre-poo treatment to your hair, working it in from the roots to the ends and gently detangling as you go.
- When a section is complete, twist or braid it.
- Repeat steps 1-4 until the pre-poo treatment has been applied evenly to all of your hair.
- Put on a shower cap and allow your hair to soak in the pre-poo treatment for at least one hour, or you can leave it on overnight.
- After an hour, or in the morning, rinse your hair thoroughly, and then continue with the shampooing steps below.
*Tip: When you are using pre-poo products, each label may have slightly different usage instructions. Follow those directions for the best results.
Shampoo Your Hair

The shampooing step is non-negotiable if you want the best results. Below are some steps to take to properly cleanse your natural hair.
- Begin by wetting your hair with warm water. Be careful not to use hot water, as this can dry out your curls.
- Apply your clarifying shampoo. Be sure to focus on your roots. The ends of your hair are the driest part of your coils, and clarifying shampoo can strip your hair of its moisture. Applying it directly to your ends could cause breakage and damage.
- Massage your scalp to get rid of any buildup from your hair products. Read this article to learn more about the benefits of massaging your hair and scalp.
- Rinse your hair thoroughly to wash out all of the clarifying shampoo.
- Repeat with a moisturizing shampoo, which will ensure that your hair is clean and completely free of product buildup while restoring some of the moisture removed by the clarifying shampoo.
- Thoroughly rinse your hair, making sure that you don't leave any shampoo behind.
- Follow up with the conditioning steps below.
Co-Wash Method

If you are in between wash days or want to avoid the potentially drying effects of shampoo, you can opt for co-washing. As mentioned above, co-washing is simply washing your hair with a conditioner.
There are many great conditioners out there that are made specifically for co-washing, like Design Essentials Almond & Avocado Co-wash and Carol’s Daughter Hair Milk Cleansing Conditioner.
Similar to the shampooing steps above, here's how to co-wash your hair:
- Wet your hair with warm water.
- Apply the co-wash product all over your hair.
- Scrub your scalp thoroughly. Co-wash doesn't remove product buildup as effectively as shampoo. Therefore, you should scrub your scalp thoroughly to get rid of as much dirt and buildup as possible.
- Rinse thoroughly and follow up with the conditioning steps below.
Condition Your Hair
After you've finished pre-pooing, shampooing, and/or co-washing, you should always follow up with a conditioner to restore moisture and leave your hair healthy and happy. Here are the steps to properly condition your hair:
- Apply a moisturizing conditioner to your hair, focusing on the ends. As mentioned earlier, the ends are usually dry and will require the most moisture. Additionally, you should avoid applying a large amount of conditioner to your roots to prevent unnecessary product buildup.
- Detangle your hair with a wide-toothed comb.
- If you have time, you should allow the conditioner to sit in your hair for a few minutes to soak in the moisture.
- Rinse your hair using cold water, which seals the hair cuticle and locks in moisture.
If your hair is chronically dry, you should consider a deep conditioning treatment. It will impart deeper nourishment and more moisture than a regular rinse-out conditioner can.
Moisturize Your Hair

It is imperative to make sure your hair is moisturized before doing finger coils. Healthy and moisturized hair will prevent frizz and hold together in the coils very nicely, enabling the hairstyle to last longer.
There are various moisturizing hair products out there, so you should experiment and shop around to find the right ones for your hair.
Some of the products you should include in your routine are leave-in conditioner, oil, and curl cream. Generally, these products should be applied to wet hair immediately after washing and conditioning.
How To Create Finger Coils - Detailed Step-by-Step Tutorial
After you've prepared your hair strands by cleansing, conditioning, and moisturizing, you are ready to begin styling. Take the following steps to create professional-quality finger coils.
- Begin removing any tangles from your hair and divide it into sections. This step will make your hair more manageable as you work.
- *Tip: If you decide to make defined, box-shaped parts as you go, make sure that you stagger the parts so that they don't directly line up with each other.
- Begin styling at the back of your head. With your spray bottle, dampen a small section of hair.
- Apply some gel to the section, focusing on the roots and working it through your hair to the ends.
- Take a smaller piece of hair from the section and hold it at the base with two fingers on one hand. Wrap the hair around two fingers on your other hand and twirl the hair repeatedly. Stop twirling when you get all the way to the end of the strand. Then, let go to reveal a beautiful coil.
- Repeat steps 2 through 4 for your entire head until all of your hair has been coiled. Remember, it is important to dampen your hair as you go, as this will aid in the formation of your finger coils.
- *Tip: If you have 4c curls, it may be a good idea to clip the coils at the root to help them lay down, and also band your finger coils and allow them to dry in the bands overnight. This will help them hold their shape longer.
- When you've finished styling your entire head, be sure to lay down your edges with edge control.
- If you'd like, you can spray your hair with some shine spray to give the finger coils an even more defined and moisturized look. Watch the video demonstration above on how to do finger coils if you're a visual learner.
Your finger coils can take a couple of hours to complete, maybe longer if you're a beginner or if you have thicker strands. If you have short hair, you'll need less time.
We recommend that you set aside at least 2 hours so that you can take your time and do the hairstyle right.
Refresh Your Finger Coils

To refresh your finger coils, simply spray your strands with a little bit of water, apply some oil if needed, and gently fluff and shake your finger coils.
If any coils have deformed, simply restyle them following the styling steps above. Also, lay your baby hairs along your hairline again using edge control if needed.
How Long Do Finger Coils Last?
Finger coils can often last up to three weeks when the coils are created on clean, moisturized hair. It's also important to refresh your coils with an oil and water mist periodically and protect your coils from frizz and dryness at night.
Maintaining Finger Coils
How you wear your hair to sleep is a crucial factor in how long your finger coils will last. To maintain your finger coils while you sleep, you should apply oil to your strands before bed and then wrap your hair in a silk scarf or bonnet.
Doing this will reduce friction against your hair and prevent frizz.
Pros and Cons of Finger Coiling

If you're still unsure whether fingers coils are a hairdo you want to try, we've included this section just for you! Below is a list of pros and cons to consider before trying finger coils.
Pros
- Once you get the hang of the technique, this style is simple to complete and great for beginners!
- This style is easy to maintain and refresh and can last for several weeks.
- This style will work on various curl types, as long as you start with cleansed and moisturized hair and use the correct hair products and tools.
Cons
- Although the styling technique is simple and repetitive, it can be tedious and take several hours to complete, depending on the length and density of your natural hair.
- The style does not work well for all curl patterns – it’s best for hair that already has a tight curl pattern.
Most people with natural hair who try finger coils love them despite the cons, but you will have to decide that for yourself!

Dos and Don'ts of Finger Coiling
Be sure to review this list of dos and don'ts before you begin styling.
Do
- Begin with cleansed and moisturized hair. This is very important for making the finger coils last and ensuring that they stay in the right shape.
- Take your time. Patience and time will ensure that your finger coils turn out beautifully.
Don't
- Don't pull on your scalp too tightly - excessive tugging and pulling when styling can lead to damage to your scalp and cause hair fallout. Be gentle!
- Don't do finger coils on dry hair. Be sure to spray your hair with water before you begin creating your coils.
- Don't skip nighttime maintenance. Be sure to wear a silk scarf or bonnet every night - your hair will thank you!
- Shirley Temple Curls on Short Hair
- How to Make Your Hair Fluffy Naturally
- How to Curl Your Hair With Straws
- Medium Length Flexi Rods on Natural Hair
That's everything you need to know to achieve beautiful, long-lasting finger coils! As you continue to practice the finger coil method, you'll eventually master it. We hope that this article was helpful to you, giving you everything you need to create this gorgeous finger coil hairstyle.


