


The Baggy Method is a popular styling routine for anyone with chronically dry hair. This overnight treatment maximizes moisture retention, which promotes fast, healthy hair growth.
This article contains everything you need to know to complete the baggy method on your natural hair.
What Is the Baggy Method?
The baggy method (sometimes spelled baggie method) or baggy hair method is a moisturizing technique that many women use to promote hair growth and soften their hair strands.
The baggy method can be done on your entire head (i.e., full head baggy method) or only on the ends of your hair - like a ponytail (i.e., ponytail only baggy method).
The bagging process entails moisturizing your whole head and then covering it with a shower cap, plastic bag, plastic cap, grocery bag, plastic wrap, or some other type of head covering (i.e., bagging).
Free 8-page guide
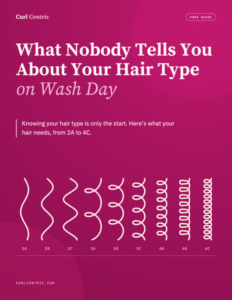
You know your hair type. Here’s what it needs on wash day.
Our free guide gives you one page for each hair type group, from 2A to 4C. Each page tells you how often to start washing, what helps your waves, curls, or coils clump, and the problems your hair type runs into most. It also has a protein or moisture chart and a log for testing one change at a time.
Free. You’ll get the guide by email, two more emails on how to use it, and then one every Thursday, plus the occasional extra. Unsubscribe anytime.
Gather Your Supplies
Before you begin the baggy method, be sure to review the below list to ensure that you have all the necessary hair products and supplies on hand.
Hair Prep Supplies:
- Clarifying Shampoo and Moisturizing Shampoo OR co-washing conditioner
- Moisturizing Conditioner
- Shower cap
- Wide-tooth comb (optional)
Hair Styling Supplies:
- Leave-in Conditioner
- Hair Growth Oil (optional)
- Curl Cream (optional)
- Shower cap, plastic shopping bag, or saran wrap
- Sandwich bags (e.g., Ziploc bags) and elastic hair bands (if you're only doing the baggy method on your ends)
- Silk scarf or hair bonnet
Prepare Your Hair for the Baggy Method
The baggy method should be done on freshly washed hair. This is because one of the main goals of this styling method is hair growth - adding product to your hair when it's covered in buildup can clog your hair follicles and slow down growth.
Not only that, but dirty hair is not as receptive to moisture as clean hair. So, be sure to shampoo (or co-wash) and condition your hair according to the below steps before you begin styling.
Wash Your Hair
The first step in preparing your hair for the baggy method is to wash it. This can be done using a full shampoo session or a co-wash.
Shampoo
If you plan on shampooing your hair, follow these steps:
- In the shower, wet your hair with warm water. Avoid using hot water, as this can be damaging and lead to excessive dryness.
- Apply a clarifying shampoo to your roots. Scrub and massage your scalp thoroughly to work out any product buildup that may be present in your hair.
- Rinse your hair thoroughly.
- Apply a moisturizing shampoo to your roots, then scrub and massage your scalp to remove any remaining product buildup. Clarifying shampoo tends to be a harsh product, so following up with a moisturizing shampoo will help to restore some of the moisture that may have been stripped out of your hair.
- Rinse thoroughly and be careful not to leave behind any traces of shampoo.
Co-Wash
Co-washing your hair simply means cleansing your hair with a conditioner instead of shampoo. To combat dryness, some women replace shampoo with a co-washing product.
Shampoo often strips your hair of its natural oils, which can lead to excessive dryness and even breakage, so some individuals with curly hair choose to avoid this altogether.
Others use co-wash as a way of extending the number of days between shampoos. This is an excellent way to retain moisture in your hair while also getting rid of product buildup periodically.
To co-wash your hair, follow these steps:
- Wet your hair with warm water.
- Apply the co-wash to your hair, combing it through with your fingers or a wide-tooth comb for even distribution.
- Scrub and massage your scalp vigorously. Co-wash doesn't lift product buildup out of your hair as efficiently as shampoo, so extra scrubbing will be necessary to get your hair clean.
- Rinse your hair thoroughly, and then follow up with the conditioning steps below if you feel like your curls need more moisture. Co-wash often acts as a 2-in-1, so conditioning again isn't always necessary.
Condition Your Hair
After you've cleansed your hair with shampoo or co-wash, the next step is to condition your hair. Remember, you're about to give your hair a lot of moisture with the baggy method, so if you co-washed your hair, you might be able to skip this step to avoid over-moisturized hair.
Follow these steps to condition your hair:
- Apply a moisturizing conditioner of your choice to wet hair.
- Using your fingers or a wide-tooth comb, work the conditioner into your strands, distributing it evenly but focusing on the ends, which are typically the driest part of your hair.
- If you have time, put your hair up in a shower cap, and allow the conditioner to sit in your hair for a few minutes so that your hair can soak up the moisture.
- Rinse your hair thoroughly with warm to lukewarm water.
Complete the Baggy Method
After you've washed and conditioned your hair, you're ready to style your hair using the baggy method. Follow these steps to achieve healthy and moisturized curls overnight!
This method can be done for your entire head of hair, or just your ends, so choose the method below that's right for you.
For Your Entire Head
If your hair is dry and in need of an all-over moisture treatment, then this version of the baggy method is probably best for you:
- Apply a leave-in conditioner of your choice to clean soaking wet hair. Comb through your hair with a wide-tooth comb to remove tangles and knots. Think of the leave-in conditioner as the main ingredient when it comes to the baggy method.
- If you'd like, you can add other styling products to your hair at this point, such as hair growth oil and curl cream, but these are not required.
- Create medium-sized twists in your hair. Twists are created by taking two sections of hair, twisting each of them in a clockwise direction while wrapping them around each other in a counterclockwise direction. Alternatively, you could braid medium-size sections of your hair or put your hair in a few small buns all over your head.
- *Tip: Whether you twist, braid, or put your hair in buns, be sure to do so loosely. This will avoid tension on the scalp (i.e., pull hair) and prevent excess shedding leading to fragile hair.
- Once your products have been applied, and your hair is secured in twists, put on a shower cap.
- Cover the shower cap by wrapping it in a silk scarf or wearing a satin bonnet.
- *Tip: If you don't have a plastic shower cap on hand, you could also use a plastic shopping bag or even saran wrap. These will all have the same heat-insulating effect.
- Wear your hair like this overnight.
- In the morning, take your hair down from the silk scarf or bonnet and remove the shower cap.
- Untwist your hair and style it as desired. Alternatively, you can just fluff your moisturized curls and go!
For Only Your Ends (sometimes called Ponytail Baggy Method)
If you feel like your hair is generally well-moisturized, but your ends could use a little TLC to prevent split ends and breakage, then this version of the baggy might be better for your hair:
- Apply a leave-in conditioner of your choice to clean soaking wet hair. You can apply it to your entire head or just your ends.
- Add other styling products, such as a natural oil or cream, if you'd like. Again, you can choose to apply them only to your ends or to your entire head.
- Create medium-sized twists or braids in your hair.
- Once you've created twists in your hair, put the ends of your twists or braids in a Ziploc bag, and secure the bag with a hair tie.
- Wrap your hair up in a silk scarf or bonnet, and wear it overnight.
- In the morning, take your hair down from the scarf or bonnet, carefully undo the hair ties, and remove the Ziploc bags.
- Untwist your hair and style as desired!
The baggy method might give your hair an extreme amount of moisture. If you find that it gave your hair a little too much moisture, you may want to do a protein treatment after a day or two.
This will help restore the vital balance of moisture and protein in your hair. Here are some popular and highly recommended protein treatments to consider:
- Arvazallia Professional Series: Fortifying Protein Hair Mask. This product includes two of our favorite natural oils, argan oil, and macadamia oil.
- Aphogee Two-Step Protein Treatment. This product is designed for damaged hair; it helps mitigate breakage and works on colored treated hair.
- Nutrafix Hair Reconstructor by GIOVANNI. This product is designed for critically damaged hair.
Pros and Cons of the Baggy Method
If you're unsure whether the baggy method will achieve the desired effect for your hair, be sure to review this list of pros and cons. They will help you determine whether the baggy method will work for you and your hair.
Pros:
- It brings maximum moisture by creating a humid environment using your body heat and constantly wet hair. This opens up your hair cuticles and allows your hair to soak in as much of the hydrating products as possible.
- It promotes increased length retention by preventing damage, especially to your ends.
- It is straightforward and great for beginners looking to create a natural hair regimen after doing the big chop!
- It is highly customizable. Feel free to experiment with different products to create your own unique version of the baggy method, one that fits your hair's unique needs.
Cons:
- This styling method may add too much moisture to fine curls. If your curls feel limp or weighed down after a treatment, we don't recommend continuing to do the baggy method.
- The baggy method isn't quick, as it will need to be completed overnight for the best results. So, if you're in a hurry, this may not be the best option for you.
- Wearing your hair wet overnight may be uncomfortable at first and will probably take some getting used to, especially if you're doing the baggy method on your entire head.
For many naturals who struggle with dry hair, the pros of the baggy method outweigh the cons.
Dos and Don'ts of the Baggy Method
This list of "dos and don'ts" will help you avoid crucial mistakes when using the baggy method. Be sure to review this list before completing the baggy method to be sure you're you'll achieve happy and properly moisturized curls.
Do:
- Combine leave-in conditioner with your preferred styling products when completing the baggy method. It may take some time for you to find the right products for your hair and to adjust your hair care regimen.
- Experiment with different styling product combinations to find what's best for your hair. Here are just a few to choose from:
- Leave-in conditioner only.
- Leave-in conditioner and oil of your choice.
- LOC method: leave-in conditioner, oil, and then curl cream.
- LCO method: leave-in conditioner, curl cream, and then oil.
- Have patience, and don't try to complete the baggy method in a few minutes. Set up a time where you can dedicate a whole night to carrying out the steps listed above.
- Be sure to balance this extremely moisturizing routine with plenty of protein. You can achieve this by including a good amount of protein in your diet or adding a protein treatment to your hair routine.
Don't:
- Don't use this method every night when styling. Allowing your hair to frequently remain damp for long periods creates the perfect breeding bacteria. It can also cause limp, over-moisturized curls that are fragile and prone to breakage. The rule "everything in moderation" applies to caring for curly hair, too! Only use this method 1-2 times per week.
- Don't omit the leave-in conditioner from the baggy method. Leave-in conditioner is the key product in this styling routine and is what differentiates it from the greenhouse effect, a similar styling method.
- Don't use the baggy method as a "pre-poo" treatment. The baggy method is meant to be used on clean, freshly washed hair, not before shampooing your hair.
Can You Use the Baggy Method for Hair Growth?
Many women claim that the baggy method encourages hair growth. While we haven't been able to find any scientific evidence that supports this claim, the anecdotal evidence is very strong.
We will update this article if we find a comprehensive case study that demonstrates hair growth results contributed to bagging. So far, substantiated before and after documentation with pictures is nonexistent.
Some Final Thoughts
It's critical that you don't only focus on keeping your hair moisturized during your natural hair journey. You should consider balancing moisture and protein for your hair and protecting the scalp's natural sebum.
Furthermore, you will need to determine the duration that works best for your hair. It's usually best to start small, maybe a couple of hours, and then analyze the results.
Some women have reportedly used the baggy method overnight and seen good results. So, you will need to play around with the method a little to find the right length of time for your hair.
All in all, the baggy method is a simple and effective moisturizing method that promotes happy and healthy curls!
We hope that this article is helpful to you and gives you all of the information you need to do the baggy method properly. We are more than confident that the baggy method will be a game-changer in your curly hair routine.